Expected learning outcome
To understand the basics of running a pipeline in Foundry by performing RNA-seq analysis on sample mouse data.
Before you start
Please go to https://www.viafoundry.com and login into your account. If you have any issues logging in, please let us know (support@viascientific.com) and we will create an account for you.
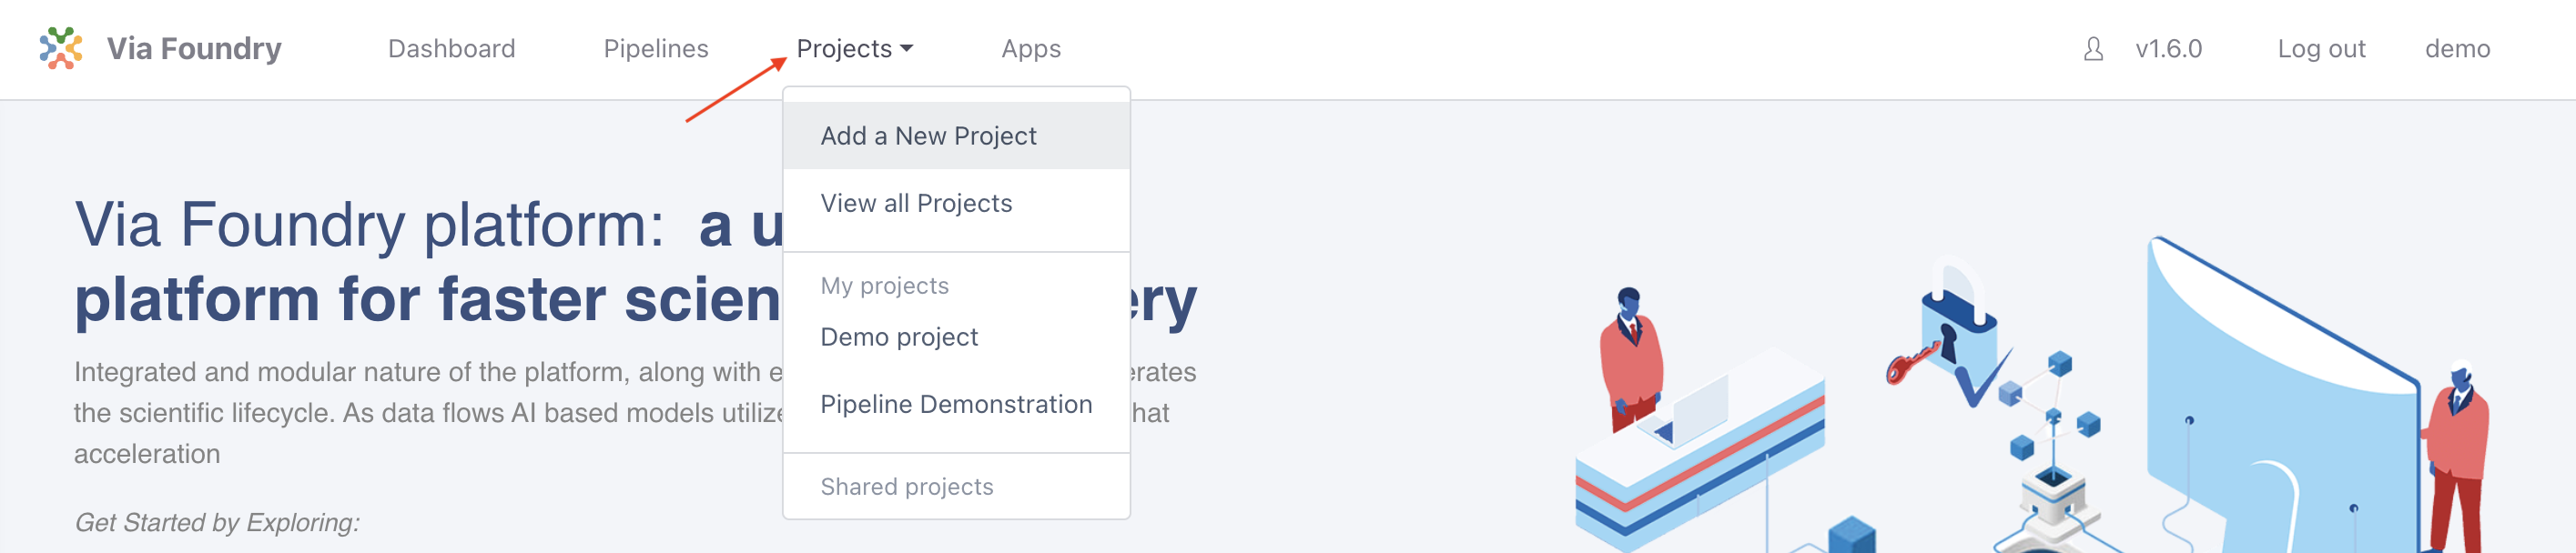
Creating a Project
In Foundry, analysis is organized by project. Each run belongs to a project and a project can consist of multiple runs.
Once logged in, to create and configure a new project click on the Projects tab in the top menu and select Add a New Project button in the dropdown. In the pop-up, give the project a name (e.g. RNA-seq Tutorial) and click save.
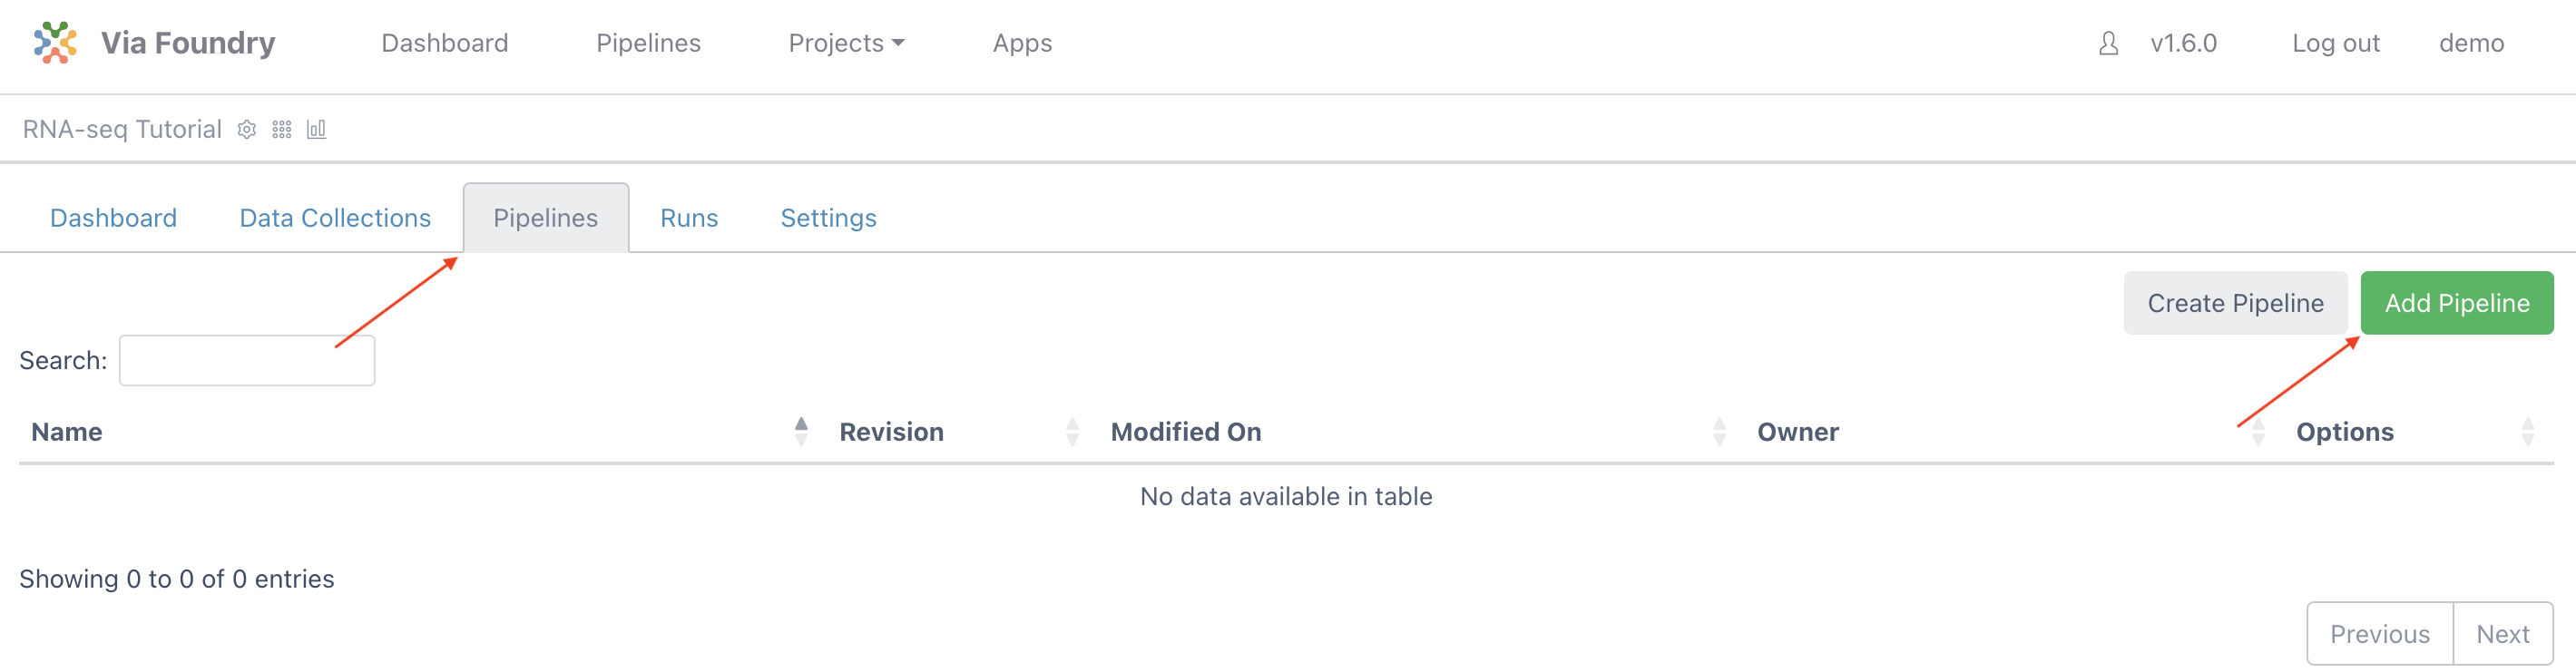
Attaching Pipeline to Project
To help with organization, pipelines used in a project are attached to that project.
Note: The same pipeline can be attached to multiple projects.
To attach a pipeline select the Pipelines tab and then click the Add Pipeline button.
Locate the RNA-seq Pipeline, click on the Add button, and then close the window.
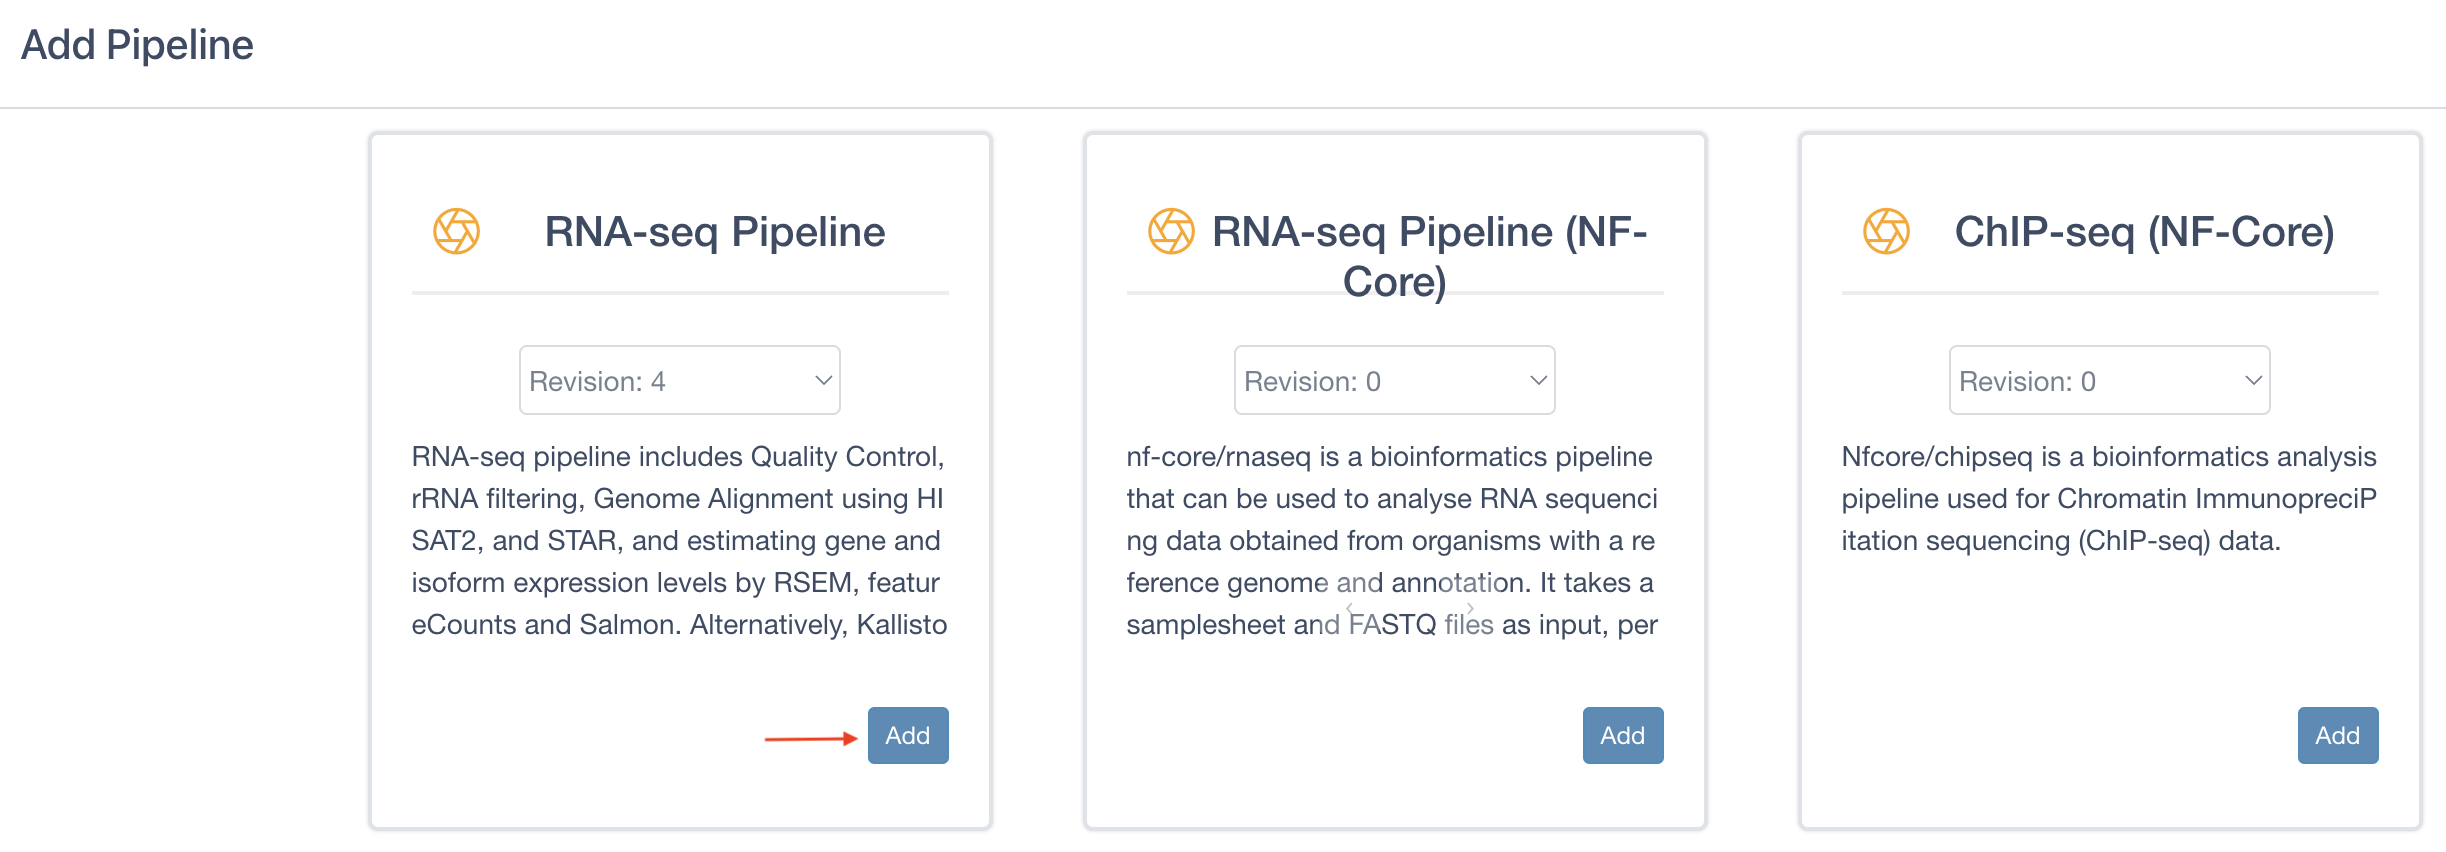
Note: For the purposes of this tutorial, be sure to add RNA-seq Pipeline, and not RNA-seq Pipeline (NF-Core)
Creating a Run
Once the project is created and a pipeline is attached, you are ready to create a run:
-
Click the
Runbutton next to theRNA-seq Pipelineentry in the table to load the "Run Page"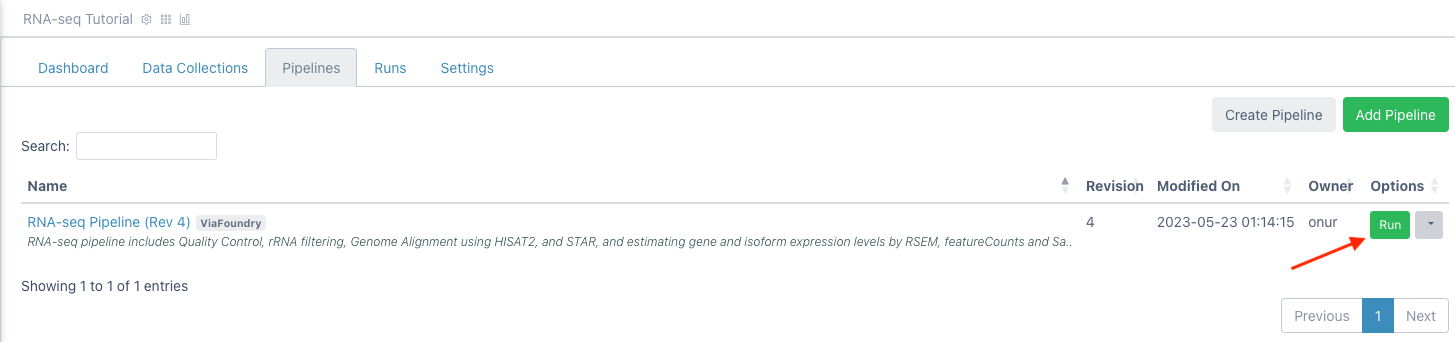
-
On the run page, under "Run Environment" select
Via Demo Environment (AWS Batch) - In the Inputs section, next to
reads, clickEnter File - In the files tab, click
Add Filebutton to enter new files. -
Next to "1. File Location", enter:
s3://viascientific/run_data/test_data/fastq_mouse -
Click the magnifying glass icon. The box below will populate with files like so:

-
In the
3. Collection Typedropdown, selectPaired List -
Under
4. File Pattern, next toForward Pattern, enter.1. Similarly, enter.2forReverse Pattern.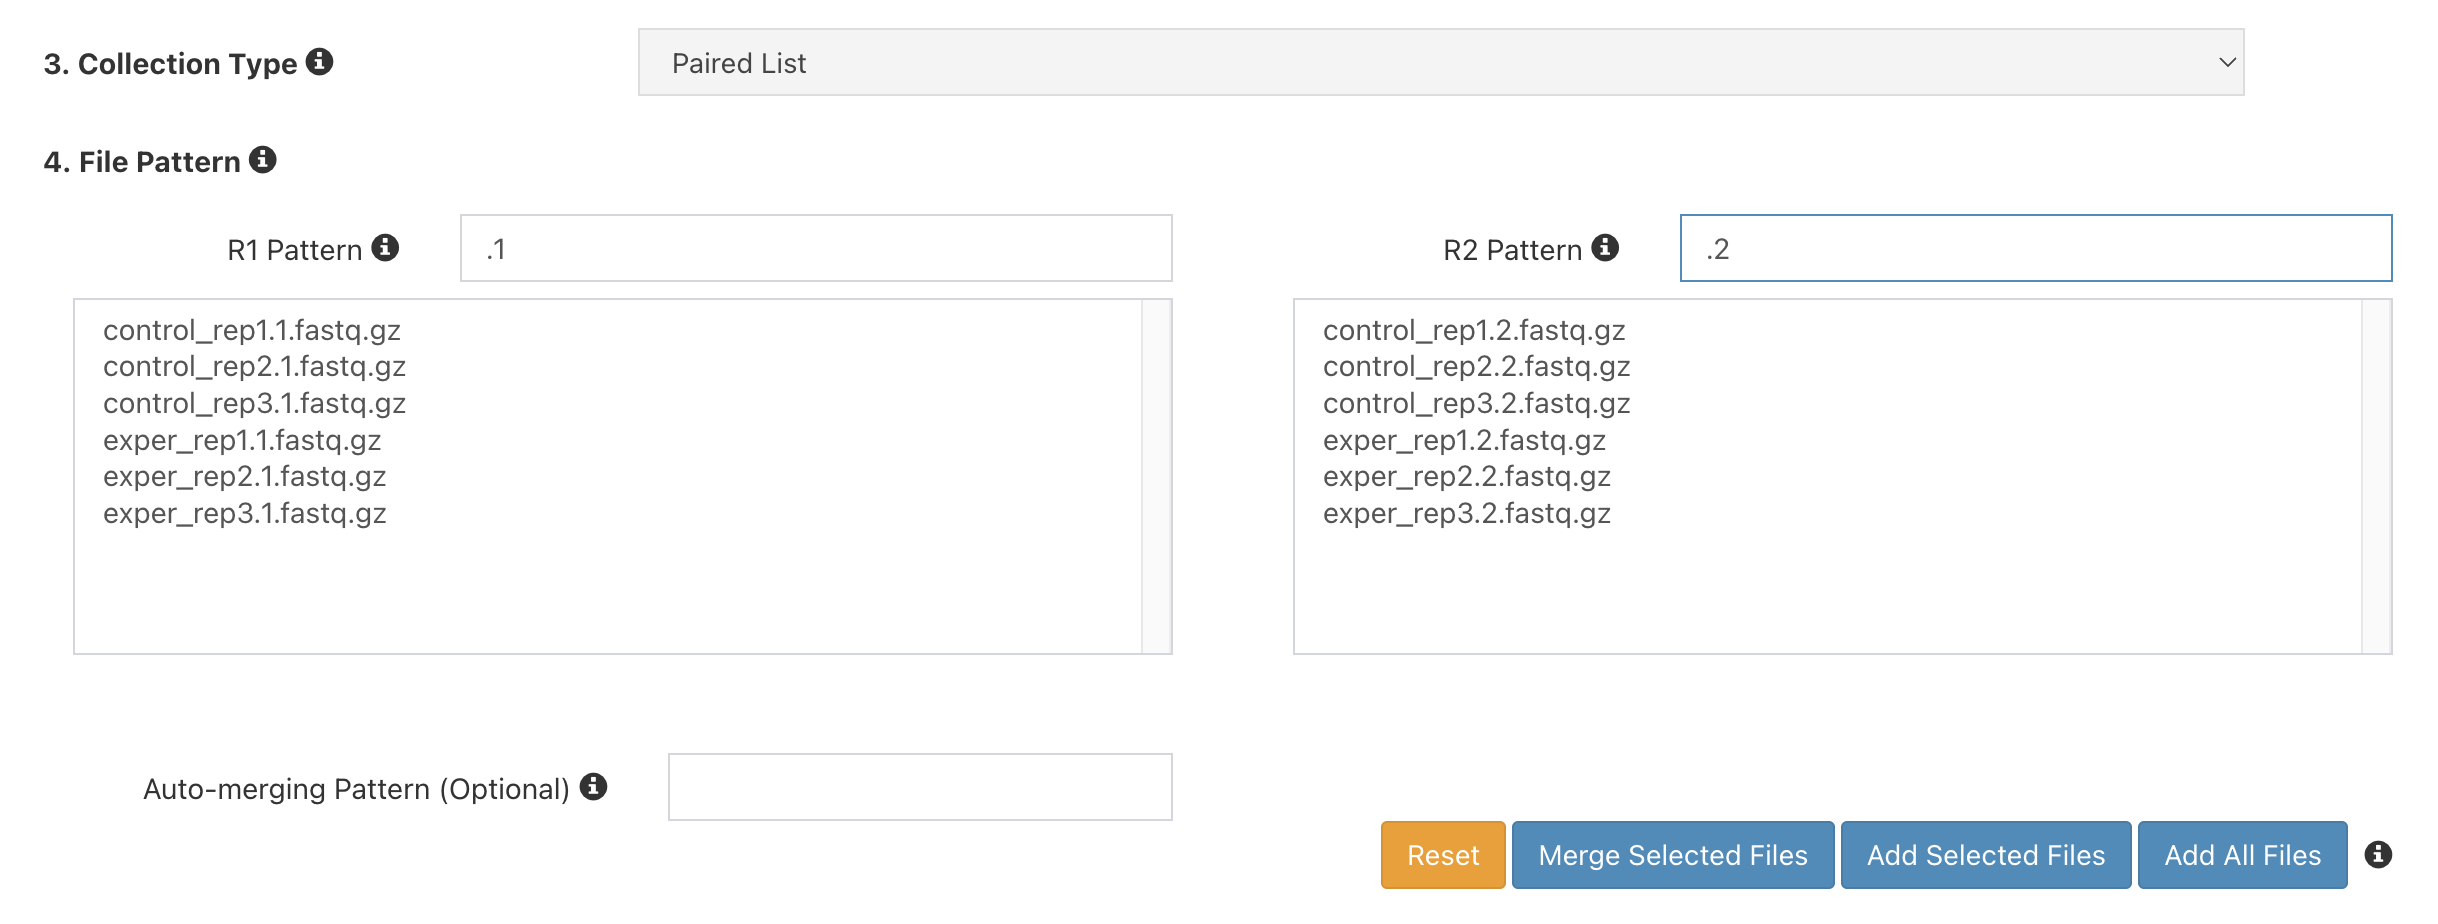
-
Click
Add All Filesbutton. You should now see 6 entries below.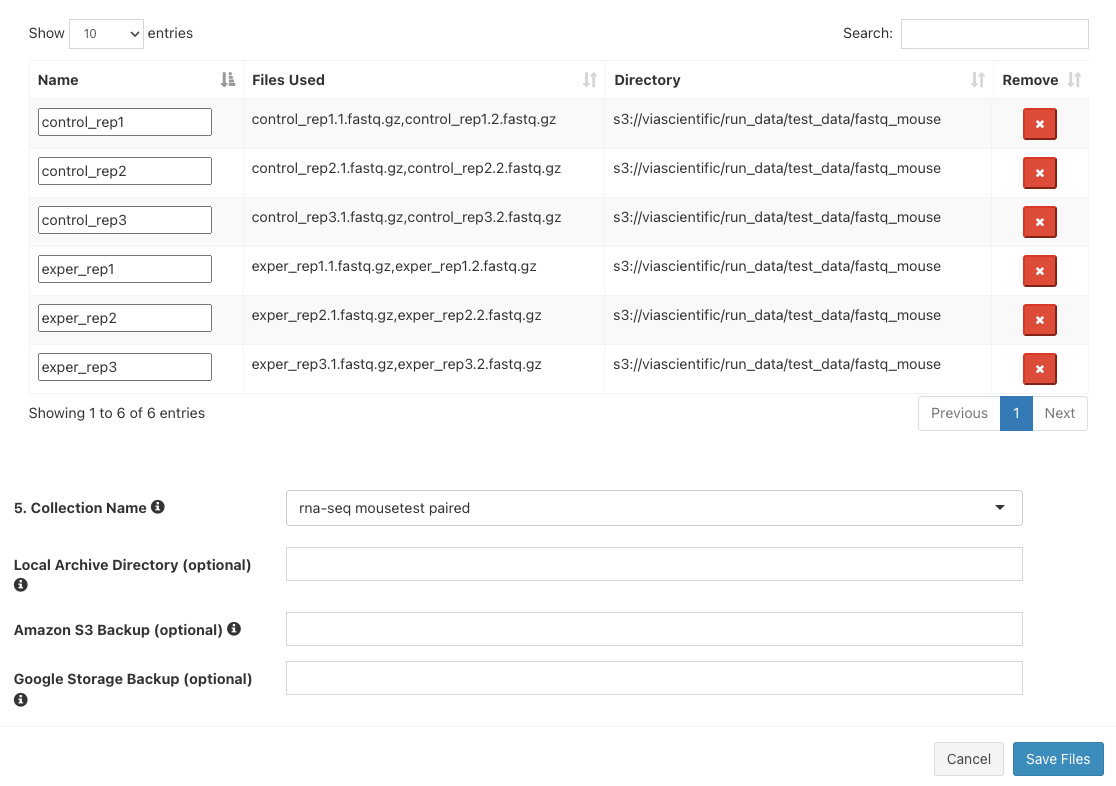
-
Next to
5. Collection Name, enterrna-seq mousetest paired. The final three boxes can be left blank. ClickSave Files - The "Select/Add Input File" screen will now have 6 entries. Click "Save".
- For "mate", select
pair - For "genome_build", select
mousetest_mm10 - Leave the rest of the inputs as defaults
- Click
Runin the top right and then selectStart. For this dataset, the RNA-seq pipeline run typically takes several minutes to complete. - Navigate to the Log tab and click on log.txt to follow the progress of your run.
- Once the status bar in the top right changes from a blue "Running" status to a green "Completed" status go to the Report tab to see the final reports.
-
Click on
Mulitiqcto open the "MultiQC" section. Scroll down to find this plot, which shows aligned reads per library: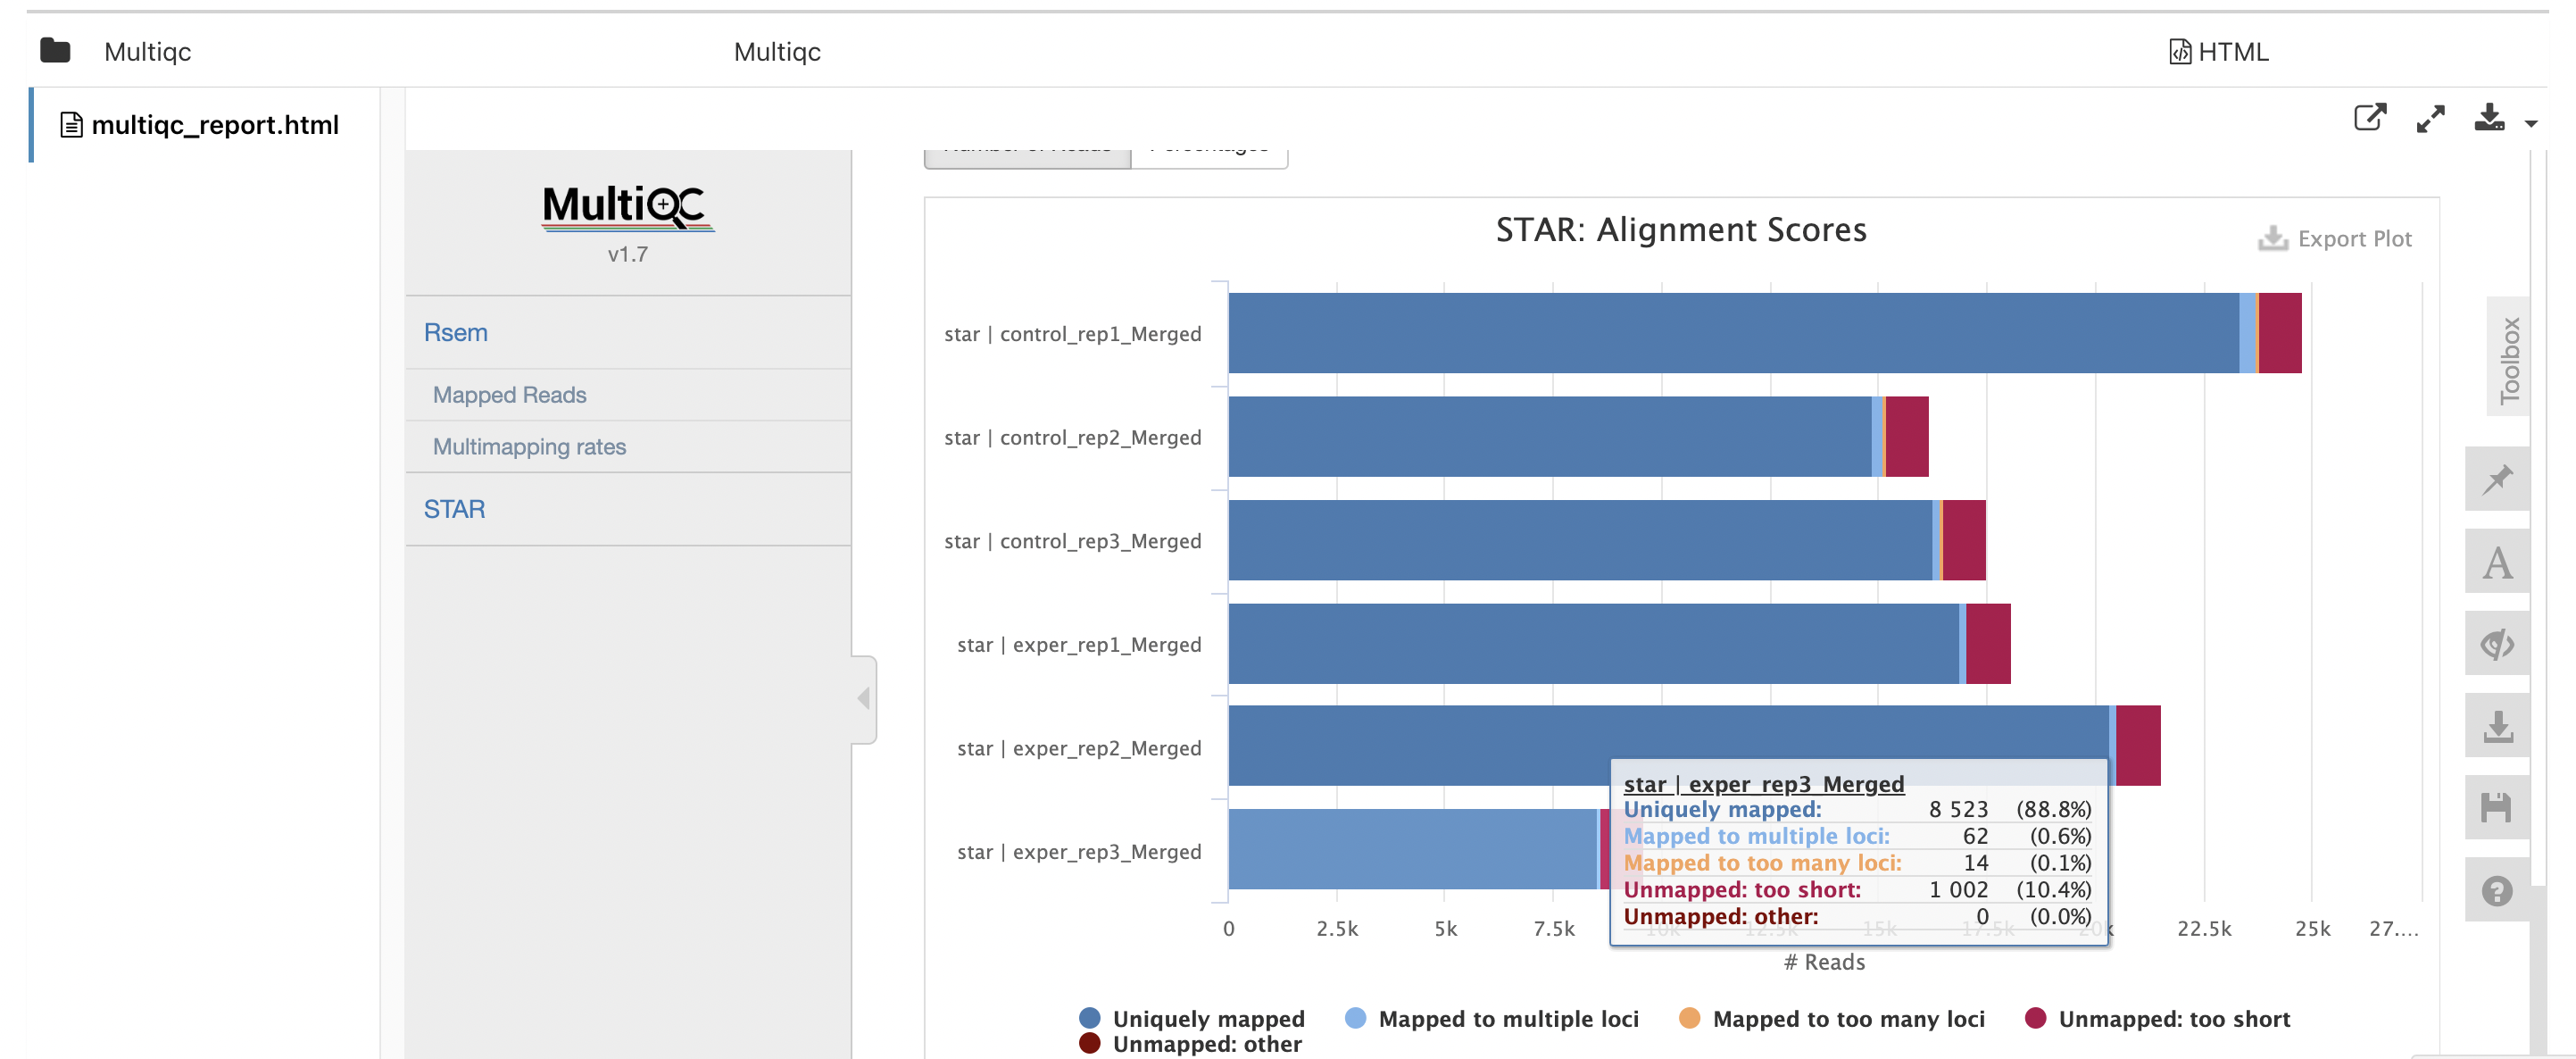
-
Open the
Overall Summarysection to check mapping rates:
-
Open the
RSEM Modulesection. that has a "View Format" of "Table" to download a count table: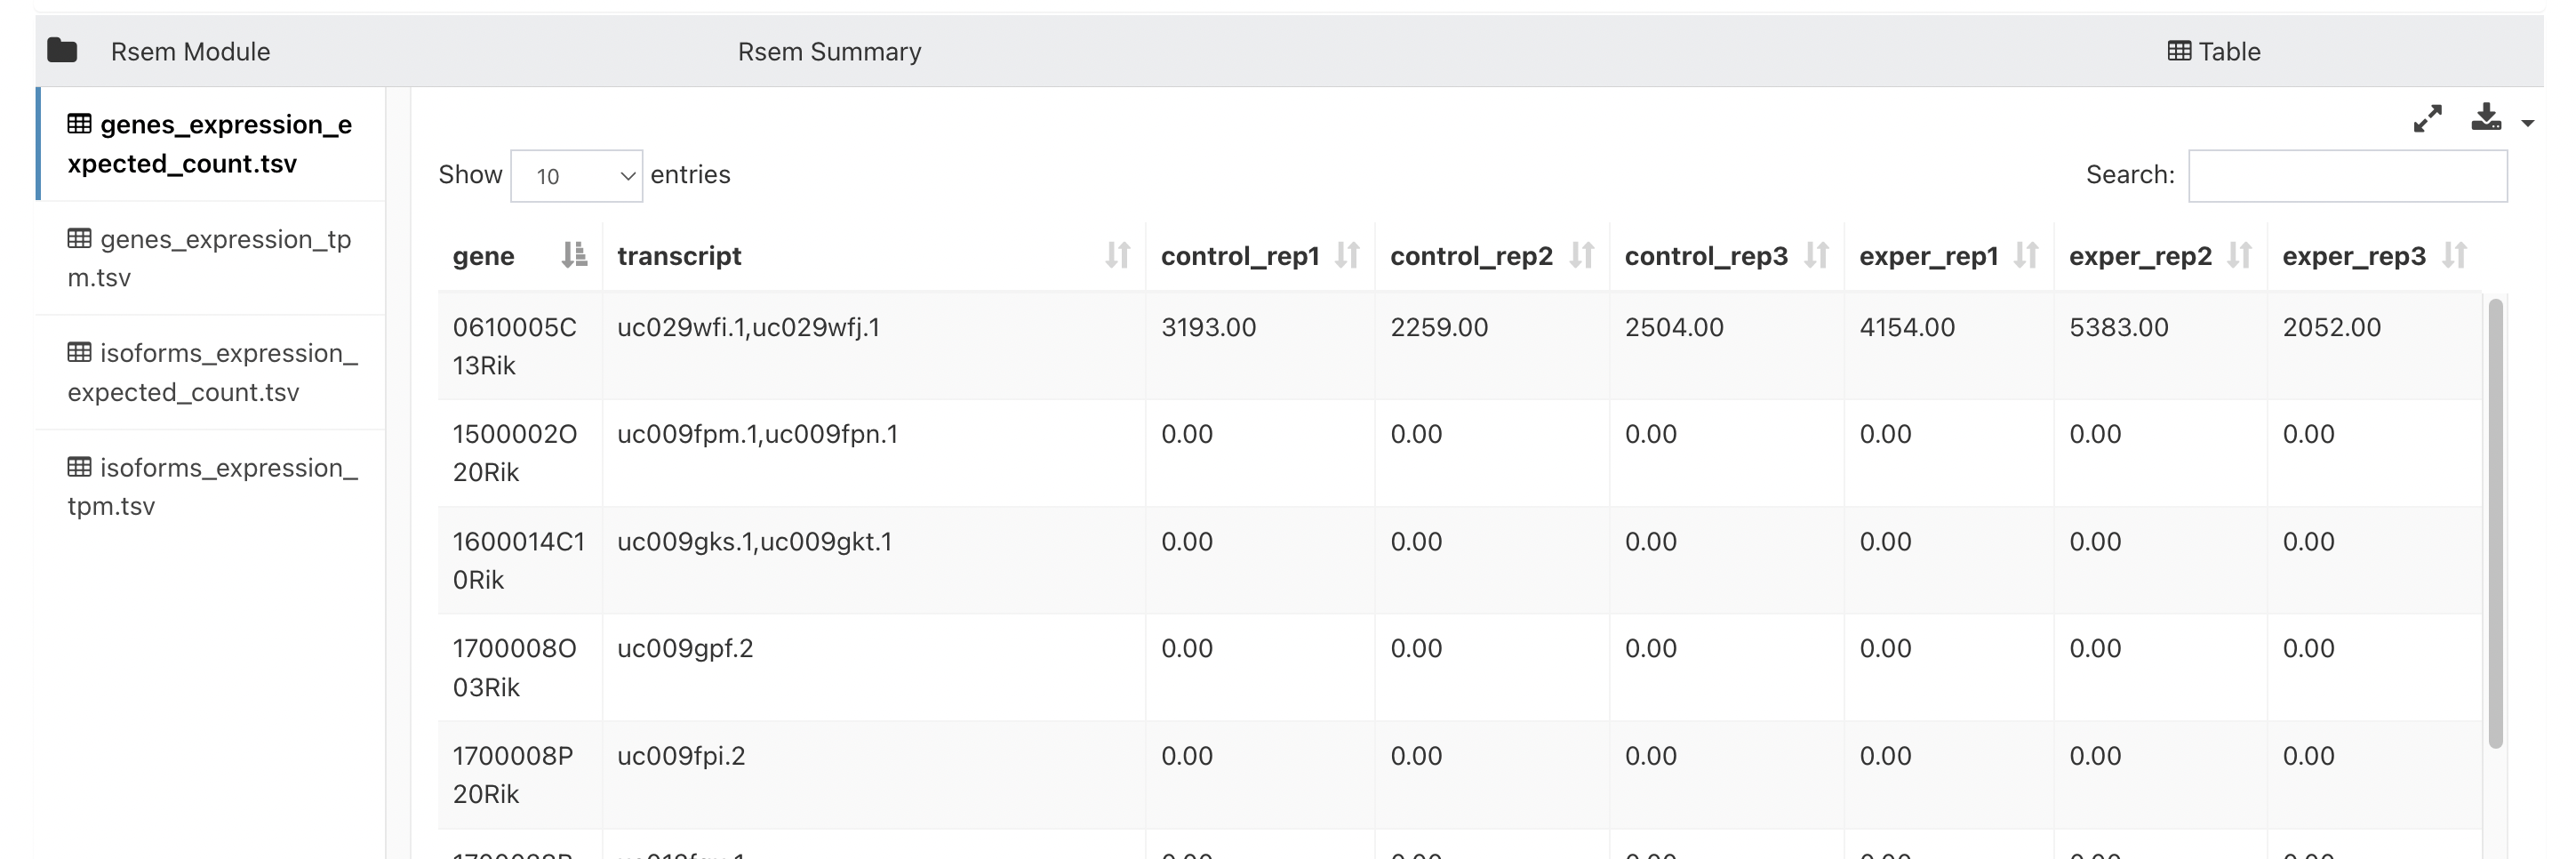
-
Open the
RSEM Modulesection. that has a "View Format" of "App" and select the "DEBrowser App" and click "Launch App" to perform Differential Expression Analysis with DEBrowser.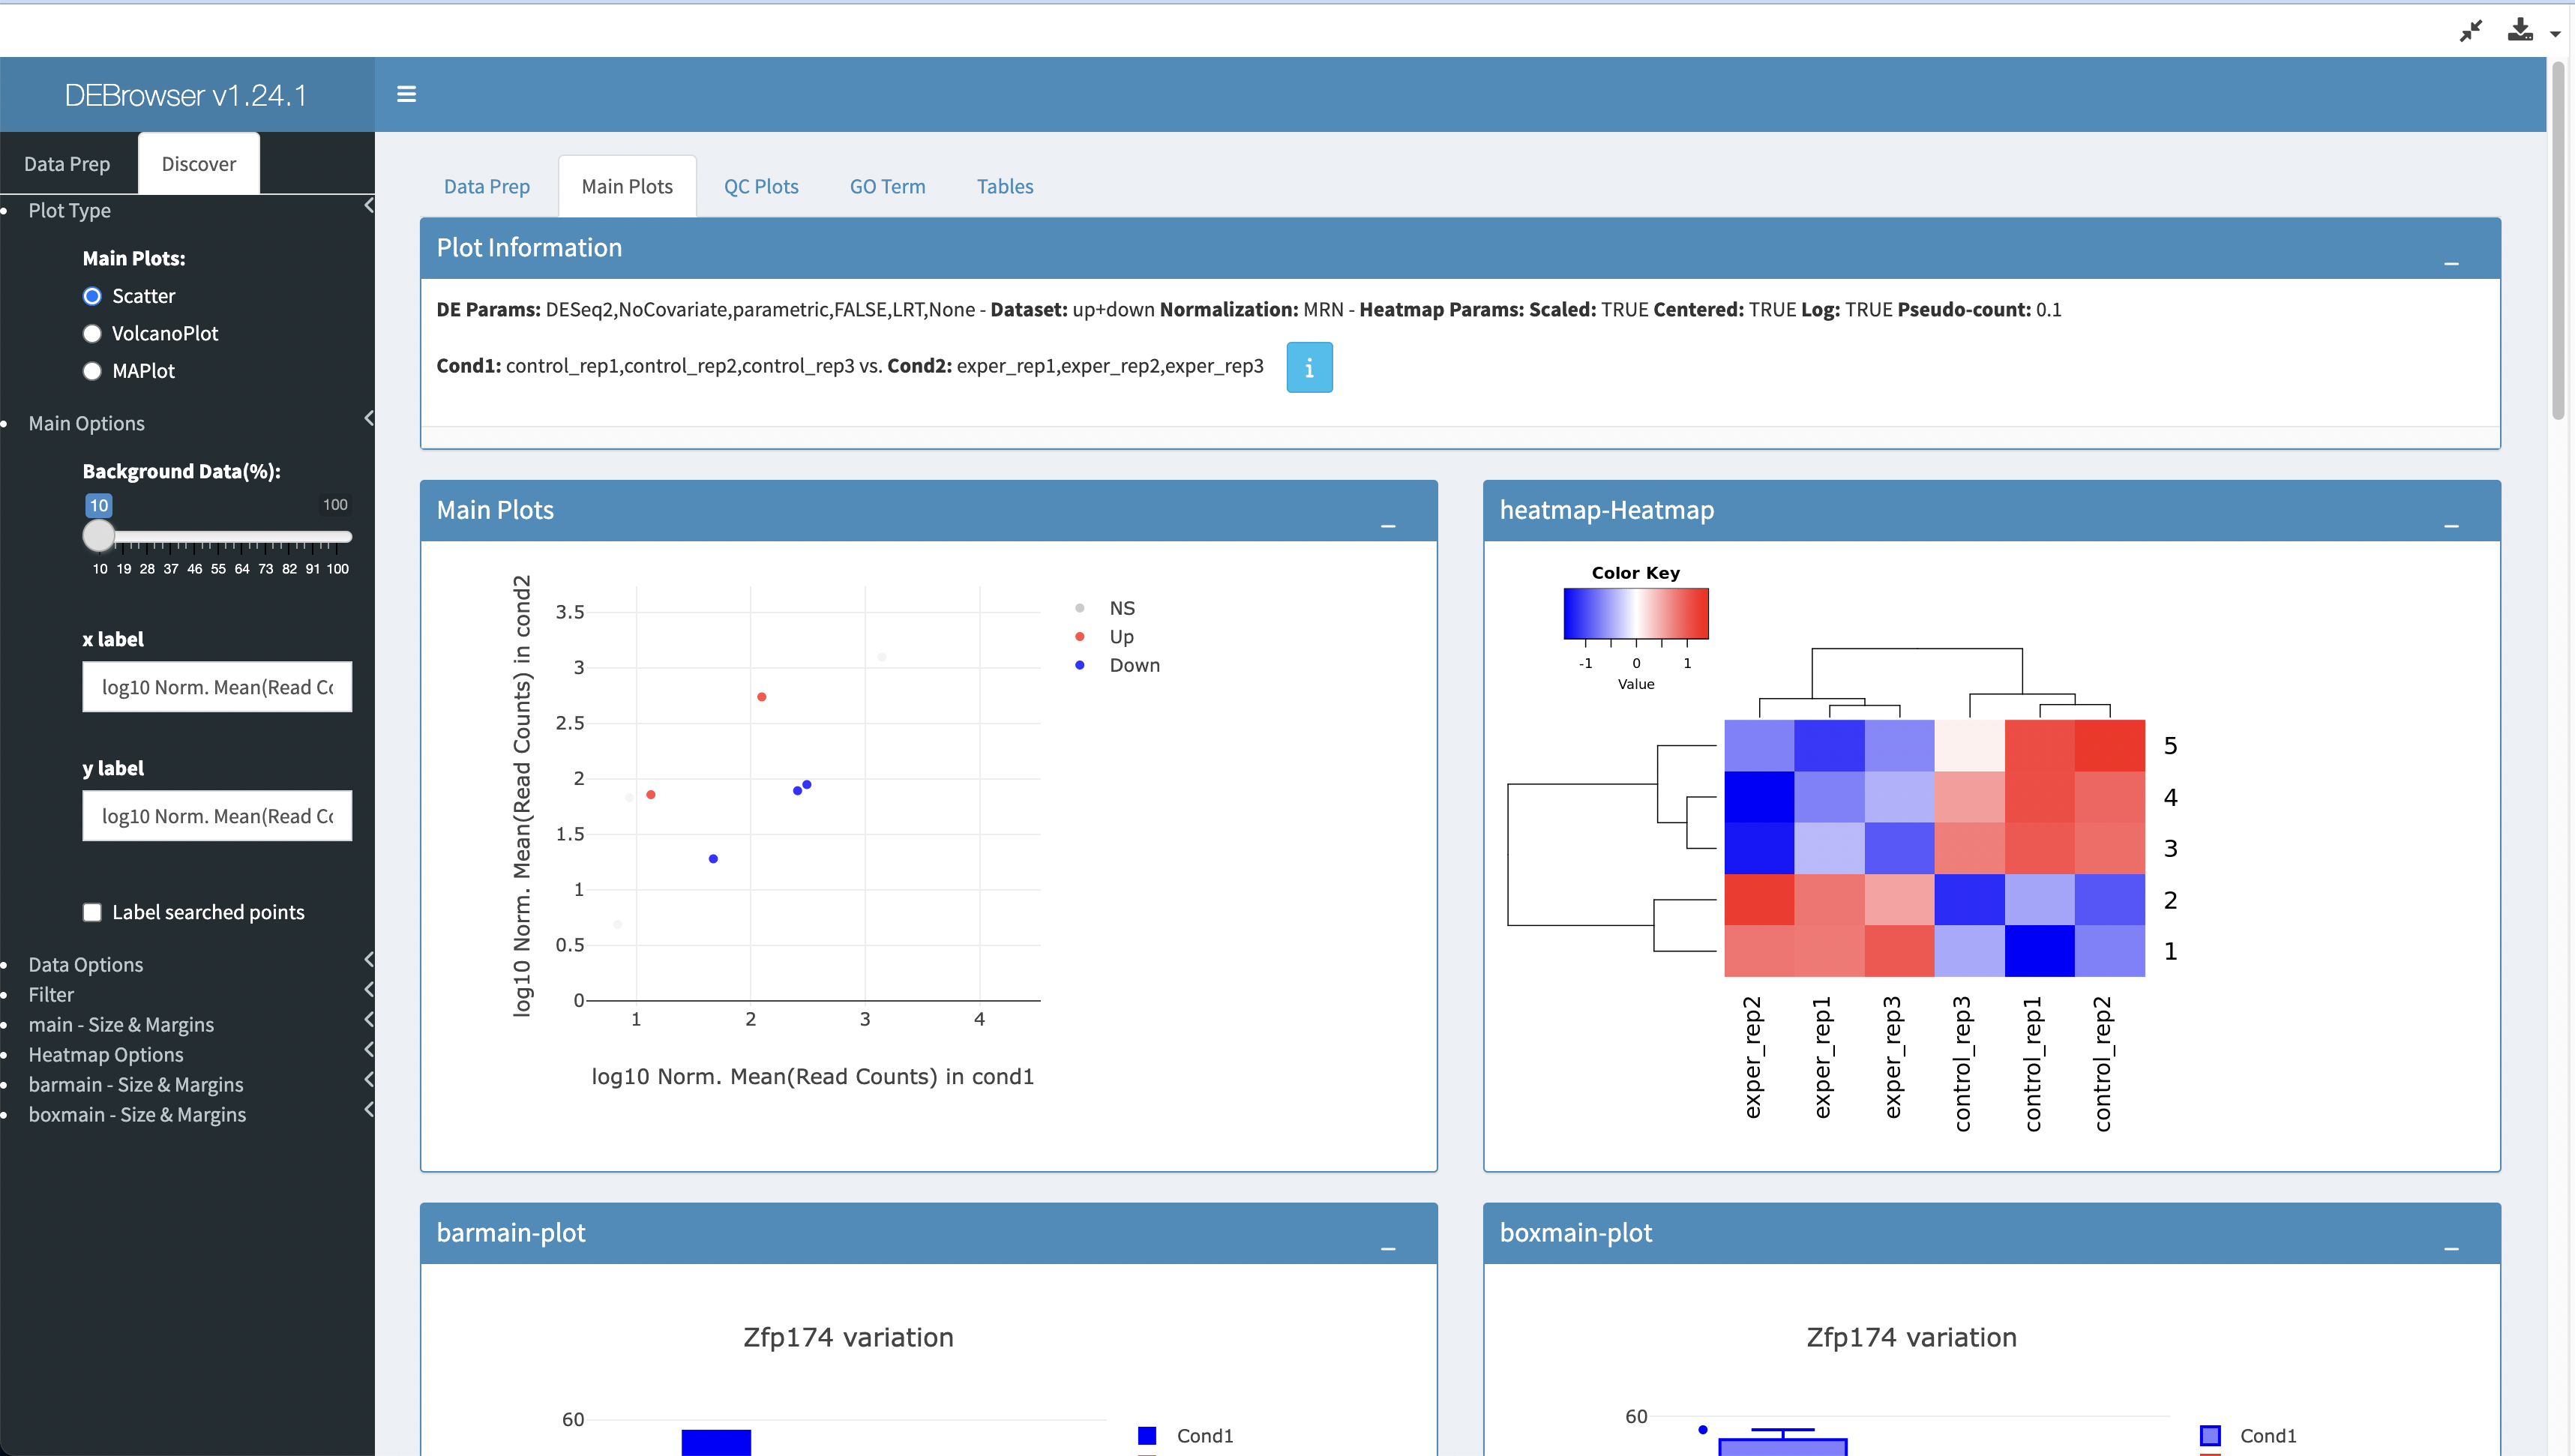
Note: For the purposes of speeding up the runtime of this tutorial, the demo dataset has been downsampled to only include a few genes. Differential expression analysis graphs will look very sparse with this dataset.
Congratulations! You have run and tested a RNA-seq pipeline on Foundry!